So every website you visit has different password requirements. One site requires an minimum of eight characters, while another is 15. Some require special characters, others do not allow it (poorly developed software). Here is how I save passwords in a way that keeps them very safe.
Password Complexity
Lets talk password complexity first. One of my favorite tech cartoons is the one from xkcd on password strength.
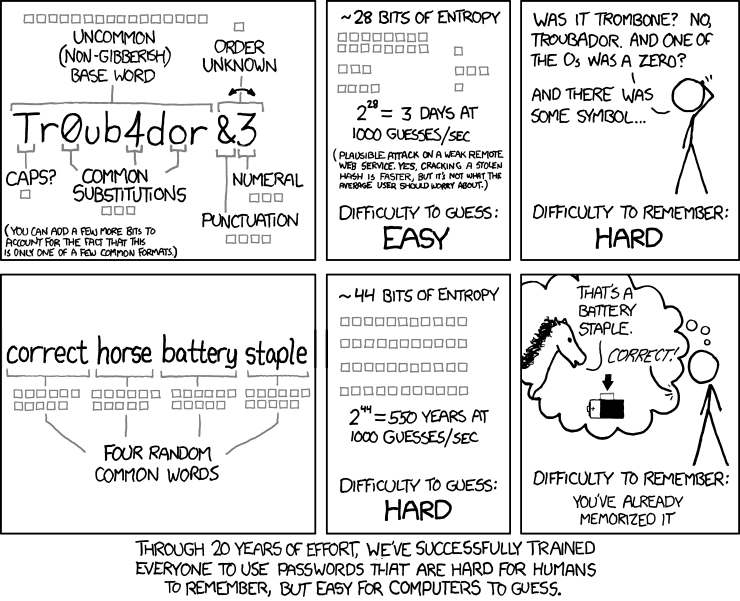
There is a lot of science in cyber security around this, and this is not a perfect system. The short story, try not to fall into the common pitfalls. Everyone uses a zero instead of the letter o, and replaces an e with the number three. You will be amazed how many passwords have an exclamation point in the password. It is better to select a password that uses a short phrase. Instead of using a password with your child’s name like Johnny!1, try a hashtag of random words like #JohnnyCarDaycare.
Establish a Tiered system
It is acceptable to reuse passwords on multiple websites. Just try to classify all sites you visit into three categories. Low security, medium security, and high security. Try to think about what the ramifications would be if someone else gained access to your account on that site. Once you have classified the sites, do not use passwords that you have used in a high security site on a low security site. For example, don’t use the same password you have for your bank as the one on your grocery store rewards card.
Keeping the Password Safe
Now you have several passwords to keep track of. There are many ways to do this but I will suggest the one I prefer. I do not care for the cloud password managers like 1password, or LastPass. I feel the best way is using an encrypted disk image on my Mac. The disk image is encrypted using AES256 encryption, which is the best there is now a days. The disk image is stored on my computer and not in a datacenter in the cloud (aka some random state/country). If anyone gets a copy of the file, they will not be able to access/decrypt it without the master password.
Here’s how you can create the encrypted disk image.
- Open Disk Utility, then click File -> New Image -> Blank Image.
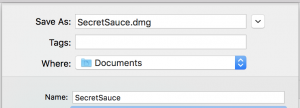
- Next name your Disk Image under Name and Save As.
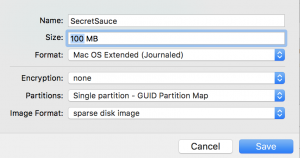
- Now select Sparse Disk Image for the image format, select Mac OS Extended as the format, and the default image size of 100MB will work.
- Lastly, select Encryption and Select AES256.
You will be asked for a password. This password must be entered every time you unlock the disk. Think of this password as a fourth tier password. One you will never use anywhere else. You will never write it down, or speak it’s name.
Perhaps a phrase from that favorite Heavy-D and the Boyz song that you secretly love so much.
Once the disk image is created, you can close Disk Utility. The new Disk image should now be mounted on your desktop.
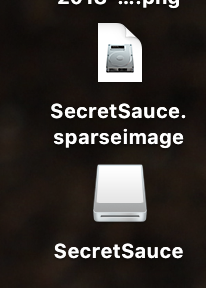
The icon above that looks like a white disk drive is the unlocked contents of the disk image file above it (named SecretSauce.sparseimage). You can now create a text file or excel spreadsheet inside this new disk image which will be automatically encrypted.
Close the door when you leave
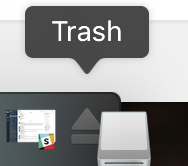
Once you have safely stored all of your information, you must unmount the drive. Drag the white disk drive icon to the trash and you will see the trash can turn into an eject button.
Everything is now tucked safely in the Disk Image.